Once you have all your materials ready, you can publish your class! These instructions are written for a desktop computer — you cannot create and publish a class through the Learnn app.
1. Log in to your account.
2. My Panel > My Courses.
3. Click the three dots in the upper right hand corner of the each selected course > Edit course
4. Click on step 4/8 (content), you can organize your content by creating multiple sections for different topics or categories ,click Save
• topics such as Comprehension , Essay or Grammar
• categories such as Notes, Projects, Worksheets
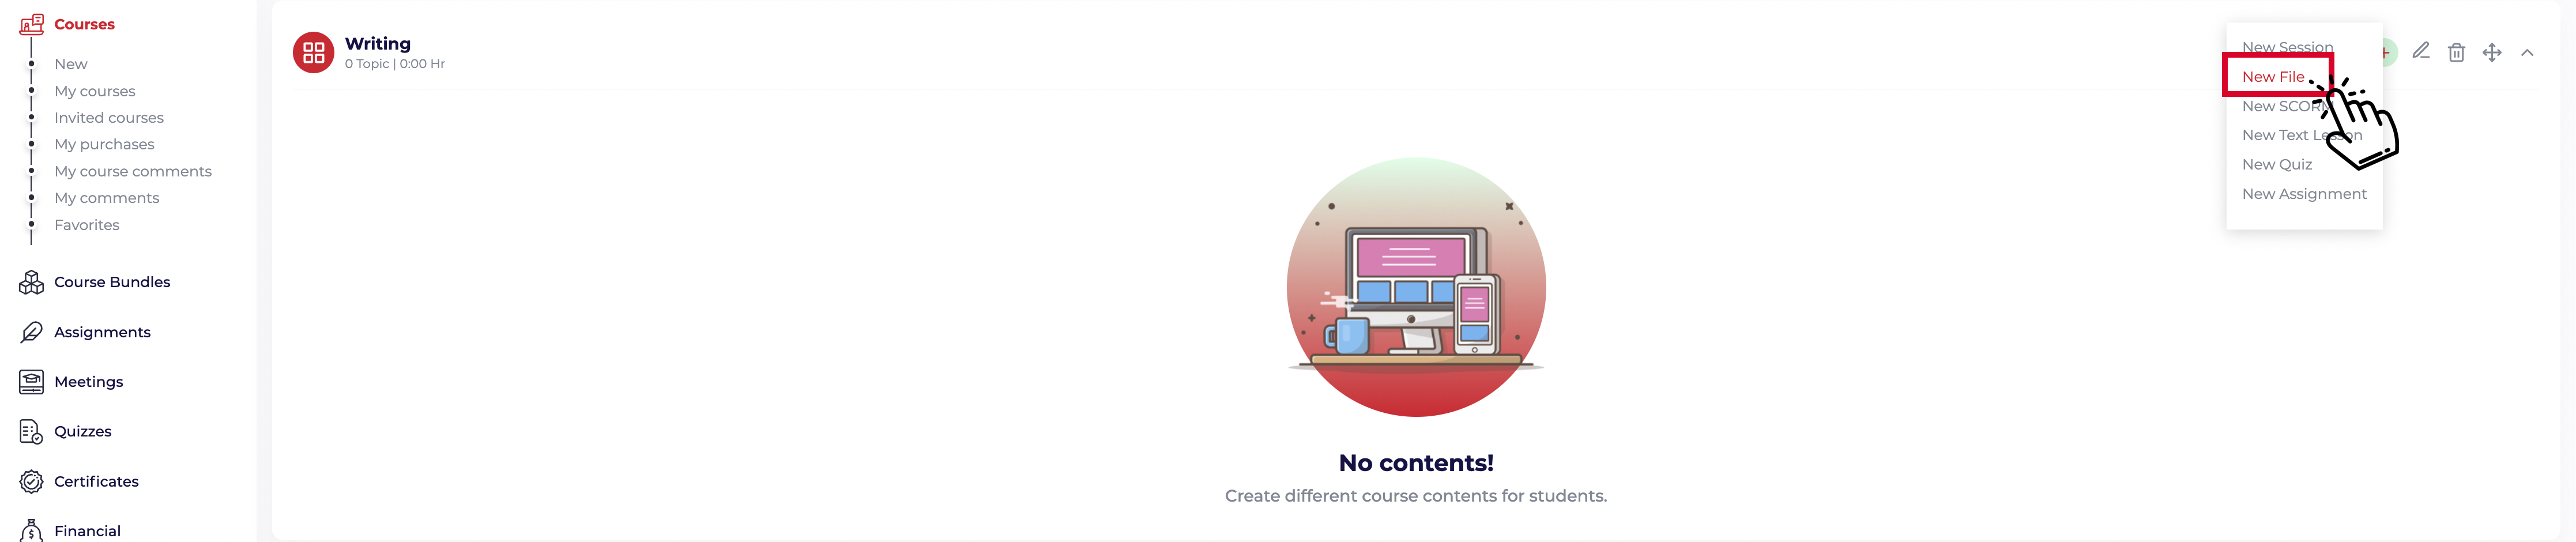
5. Click the “+” button on upper corner, a dropdown menu for you to select your content type
6. Upload your content.
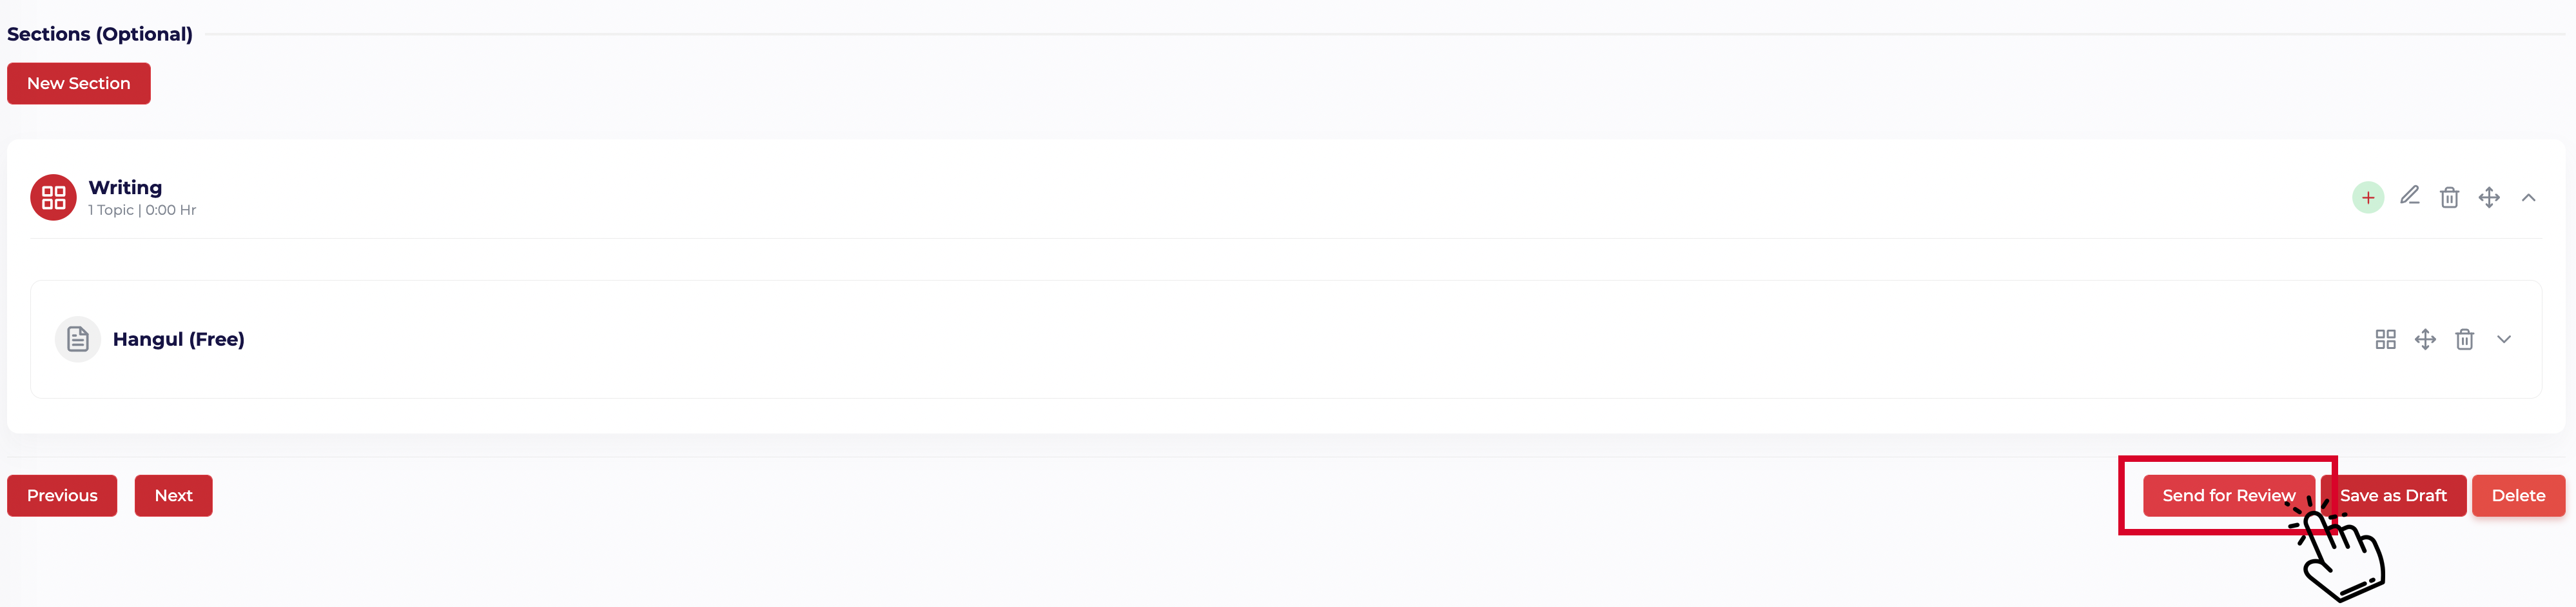
7. Click Send for Review button at the bottom of the page to publish your content.
8. The instructor should agree on terms and rules. If there are important points for a reviewer, the instructor can write them in the message field.
9. Status change from “draft” to “waiting ” once submitted. Courses are subject to review, when a course is unpublished, it will not appear on the main directory.
10. Status of course turns “in progress/ not conducted” once is published.
For file upload (PDF, powerpoint, sound, video, image, archive, document, project),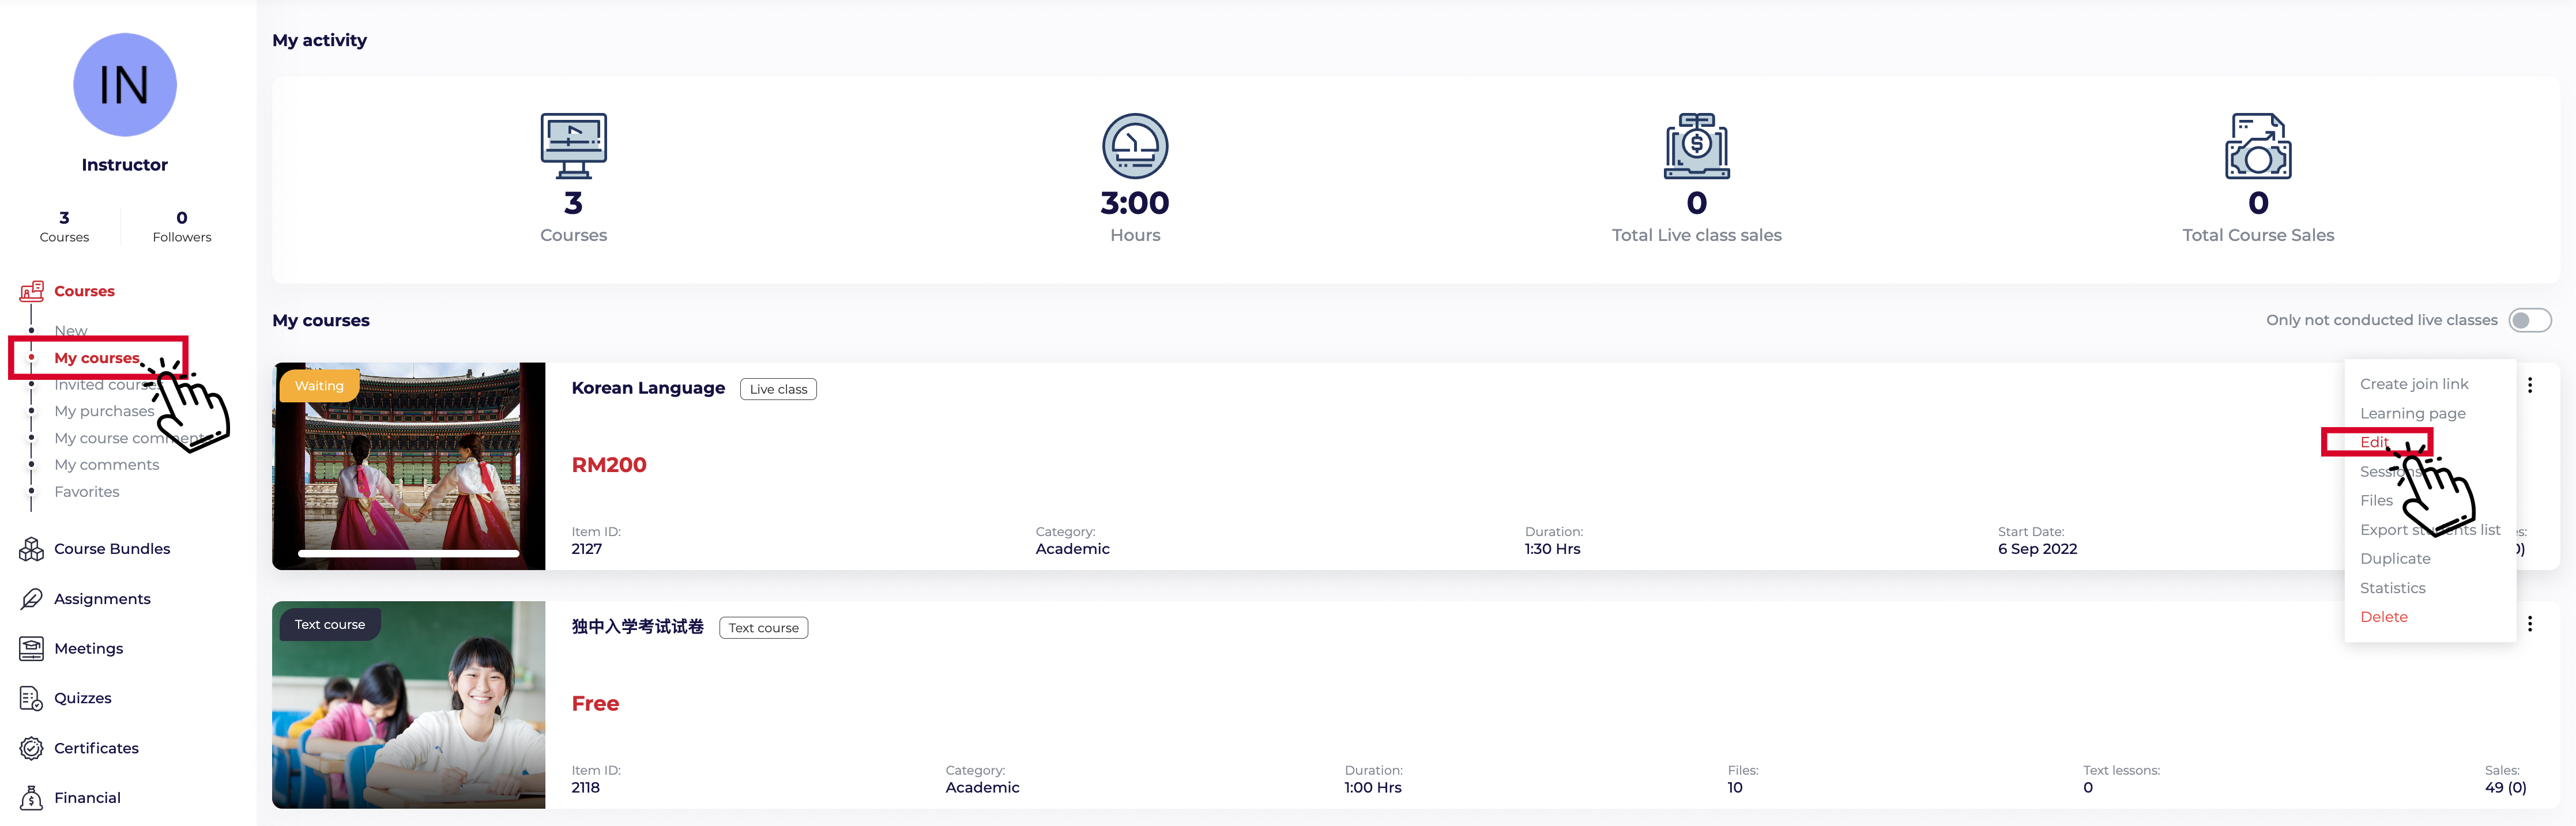

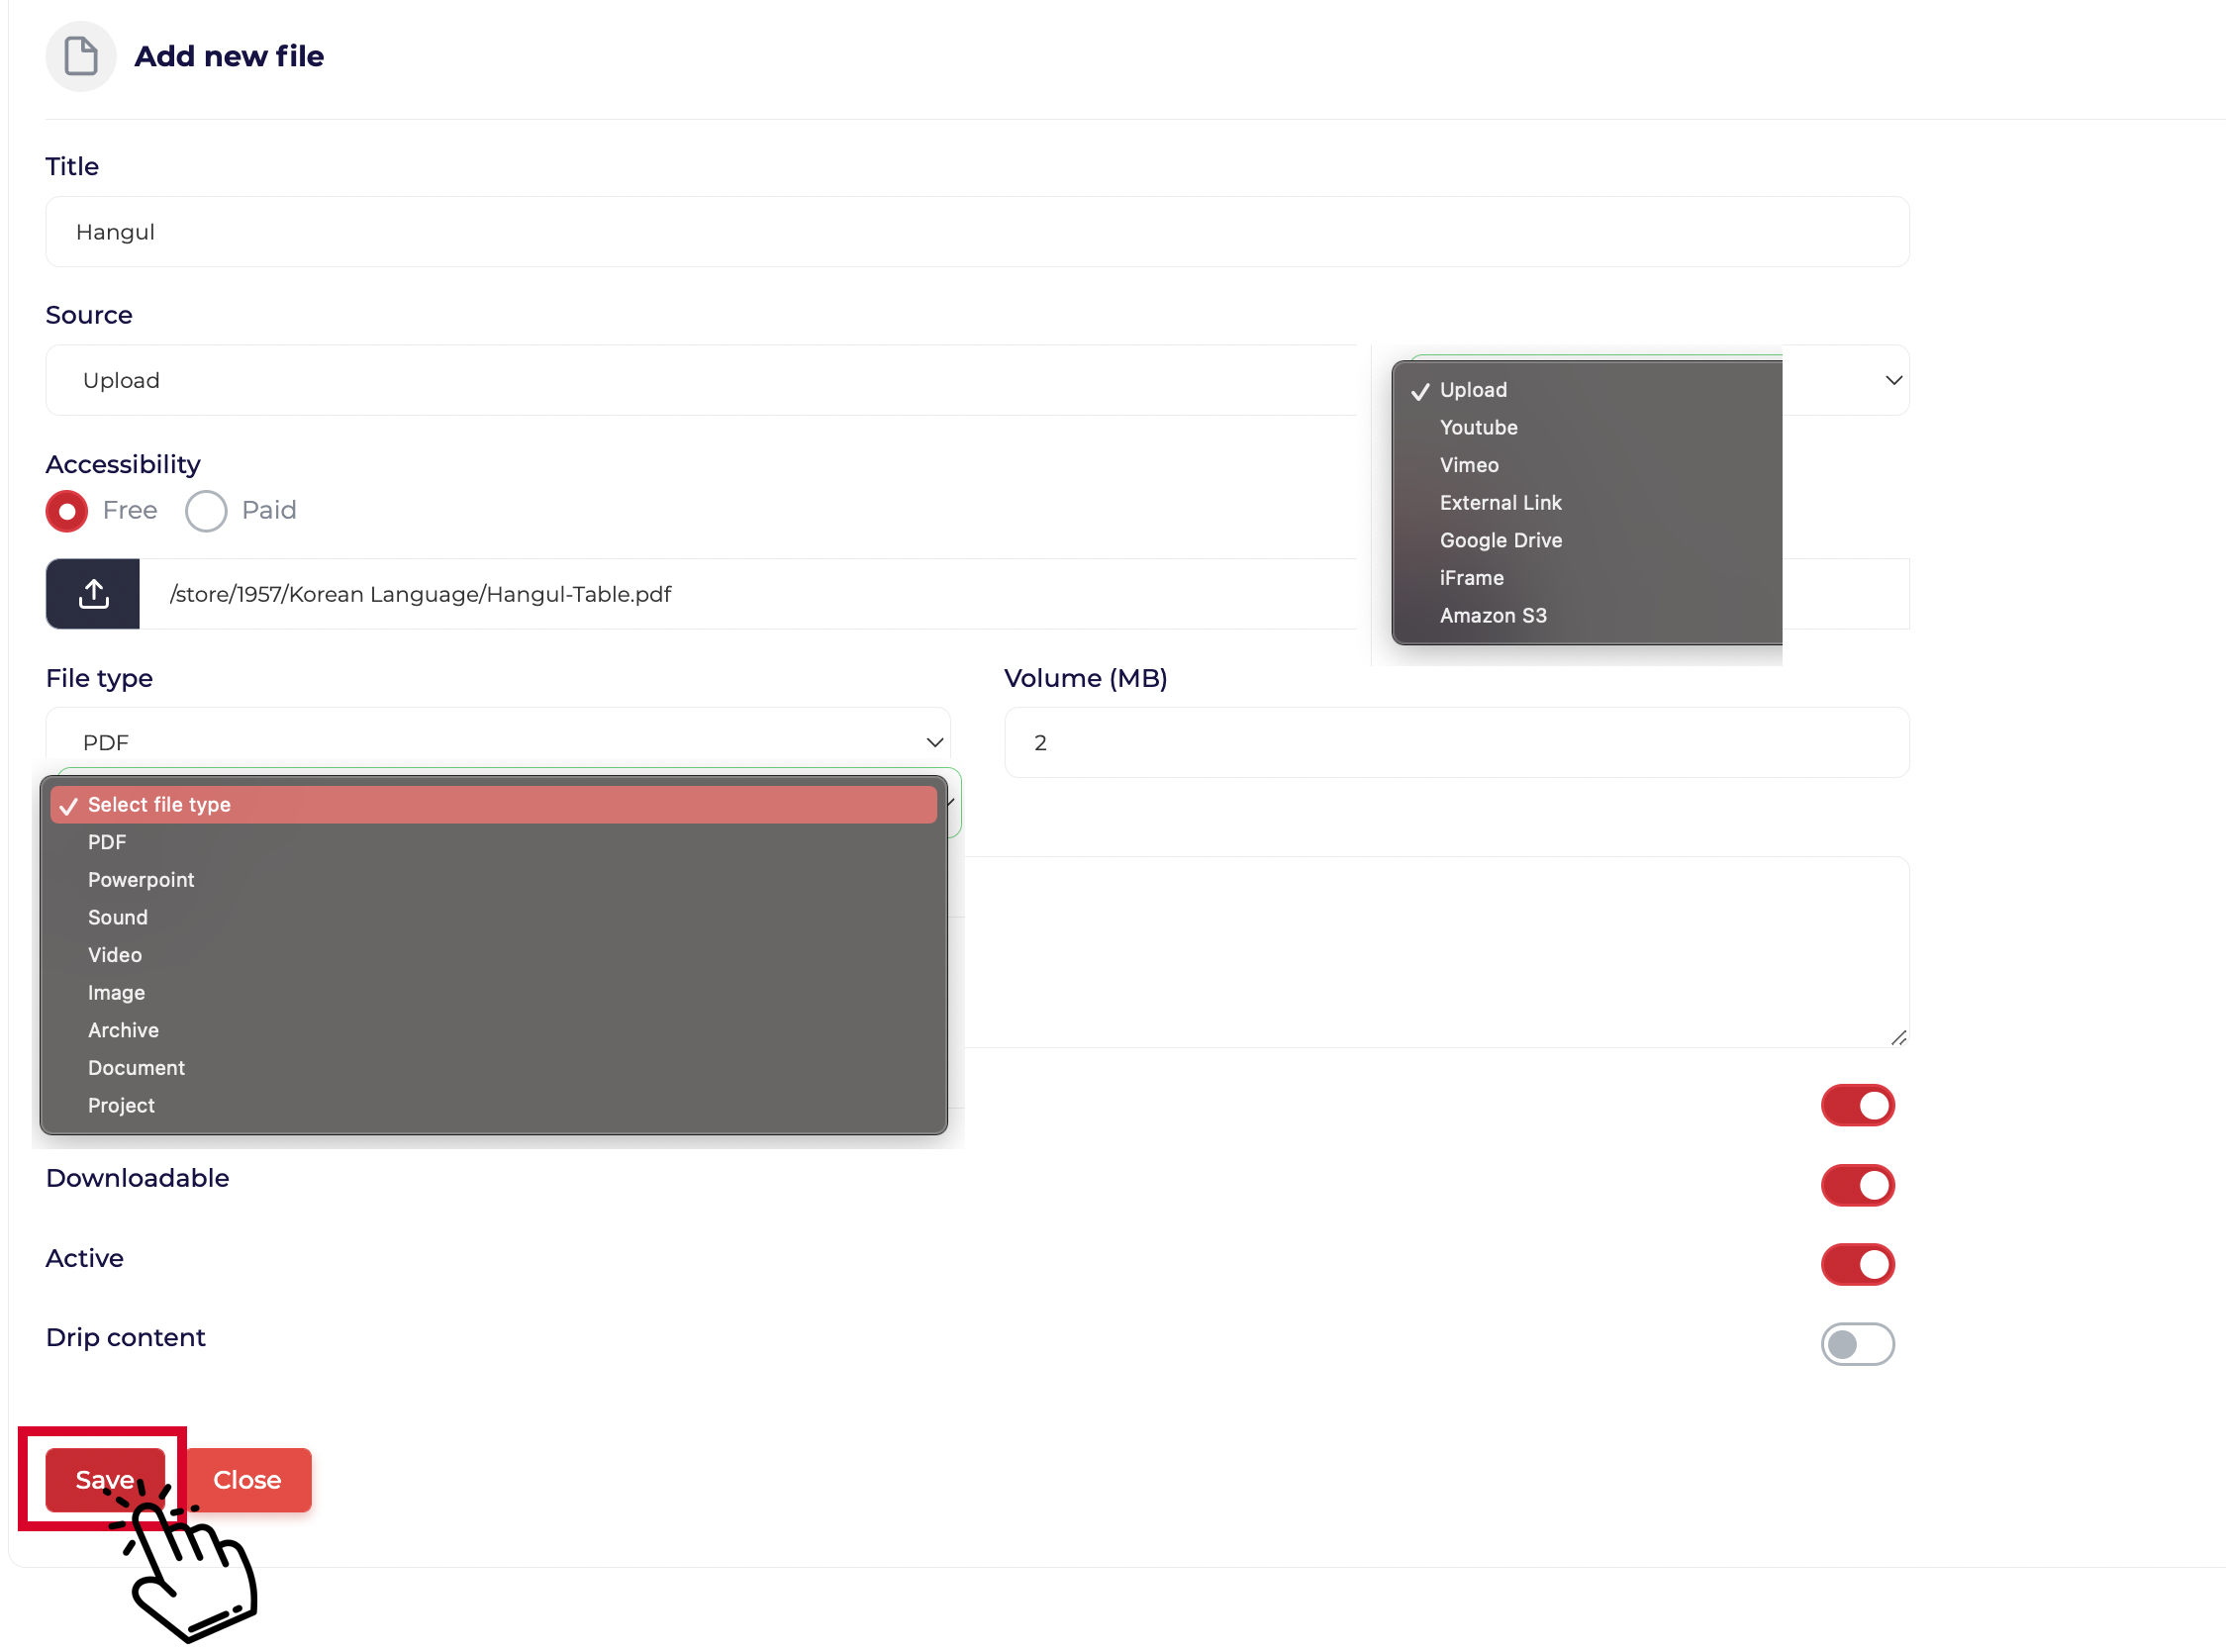
Source :
Open or create a folder. To upload files and folders, drag them into the folder.
you can also use Youtube/Vimeo/external links as of course parts so they could be used as free and safe video storage
For Youtube and Vimeo files select the related radio button and select “Local” for files that you want to upload from your computer
File type:
Publish your content in multiple formats to grab your student’s eyeballs.
Accessibility:
User will be able to access “FREE” files without purchasing the class. For “PAID” files, the student should enrol in the course to access them.
Description:
The description will be displayed on the class page for each file
Downloadable:
If you want to allow users to download the files, turn it on. Turn it off if you want to allow users to just view the file.
Dripped content:
Restrict the student’s access to the course chapters and files by different limitation parameters like time and sequence content. You can force students to access course part X days after purchasing the course and force them to pass the previous part.

The instructor should agree on terms and rules. If there are important points for a reviewer, the instructor can write them in the message field.
Status change from "draft" to "waiting" once submitted.
Courses are subject to review, when a course is unpublished, it will not appear on the main directory.
Status of course turns "in progress/not conducted" once is published.
For scorm upload
Bring the interactive educational experience to your platform. Publish courses made by Adobe Captive, iSpring, or any other software. There are many platforms out there, so make sure you choose a SCORM course builder that's right for you and your team!
For text lesson
Study time:
Estimated time for reading the text lesson.
Image:
The image that will be displayed on the lesson page.
Accessibility:
Users will be able to access “Free” lessons without purchasing the class. For “Paid” lessons, the student should enroll in the course to access them.
Attachments:
You can assign predefined attachments to a text lesson (Projects, related files, etc) so you should define course files and select them from the dropdown. All of the related attachments will be displayed on the lesson page.
Summary:
A brief description of each lesson will be displayed on the course page.
Content:
The text course content will be displayed on each lesson page. HTML content supported. New file source type introduction :
Google drive:
You Will be able to use google drive as file storage hosting.
If you use google drive source type for your files, you need to use embed code.
1. First, preview your file on google drive
2. Select open in a new window.
3. A new tab will open, then select embed and copy embed code in opened modal.
Note: make sure your file is shared with everyone.
iframe:
You should copy the iframe code and copy it without any changes .in some websites iframe code is labeled as the "embed" option.